Uploading/launching a course in SCORM Cloud using C# .NET

This tutorial focuses on how to create and upload a course to SCORM cloud using C# .NET. It describes creation of course using SCORM standards, uploading the same to SCORM Cloud and then launching it.
###What is SCORM?
Sharable Content Object Reference Model (SCORM) is a collection of standards and specifications for web-based electronic educational technology (also called e-learning). It defines communications between client side content and a host system (called "the run-time environment"), which is commonly supported by a learning management system. For more information go through the wikipedia link here
###SCORM Cloud This provides a cloud account where we can upload the courses in SCORM standards and can be launched from your application by following the SCORM standards. The Rustici software provide a free SCORM account to start with (for non-commercial use). However this has a upload limit of 100MB. For unlimited space, we might need to have a premium account.
###SCORM Cloud API Rustici software provides a API which can be used to communicate with their SCORM Cloud. We would be using their .NET library to upload a course to the cloud and launch a course from cloud.
###SCORM Cloud .NET Library To use the SCORM Cloud .NET library provided by Rustici software, download the code from the below GitHub repository. Then build the solution and copy the dll to your project and add the reference.
Github repository: https://github.com/RusticiSoftware/SCORMCloud_NetLibrary
Note: There is also a .Net Demo application available for download here: SCORM Cloud .Net Demo App The demo app is meant to provide examples for how to use many of the basic library calls.
###Steps to create and upload a course to SCORM Cloud:
Create a free cloud account here - https://cloud.scorm.com/sc/guest/SignInForm.
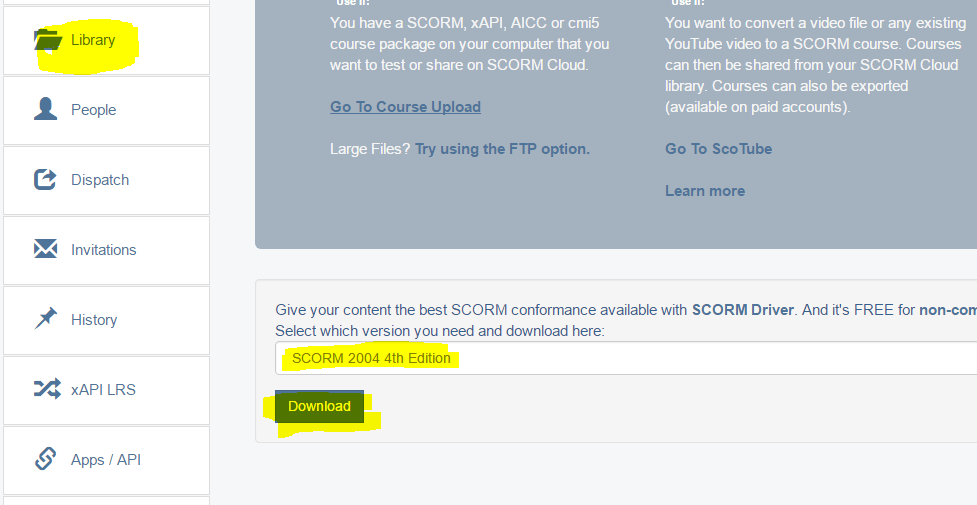
Once the account is created, login and go to ‘Library’. There you can find an option to select the SCORM version from the dropdown. Select the version as 'SCORM 2004 4th Edition' and click on Download to download the drivers in zip format. This zip file would be used while uploading any course to Cloud.

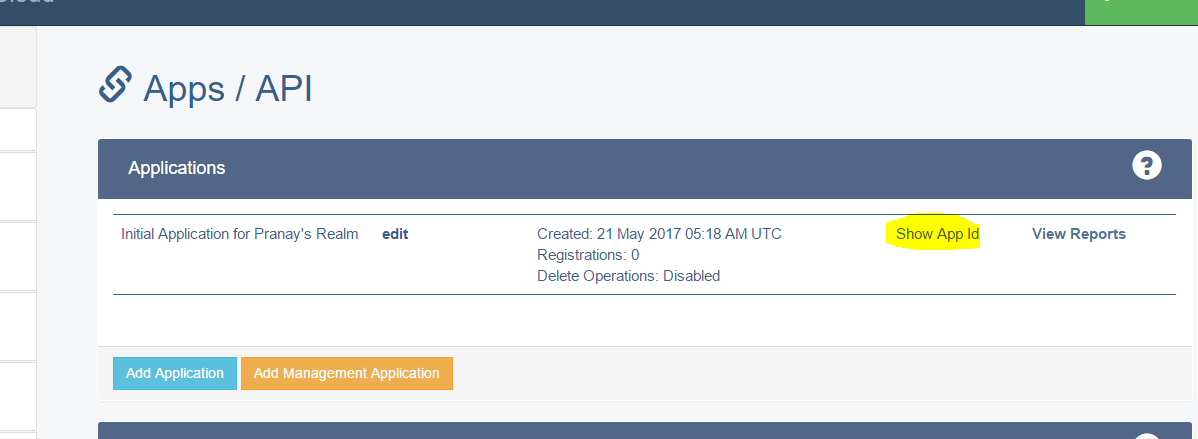
Go to the ‘Apps/API’ tab and note the ‘Application Identifier’ and ‘SecretKey’
Build the .NET library which we downloaded from the Github repository (https://github.com/RusticiSoftware/SCORMCloud_NetLibrary) and add as reference in the application from where we are going to upload the course to SCORM cloud.
DLL Name: RusticiSoftware.HostedEngine.Client.dll
Creating course Zip file using the SCORM drivers zip file. All we have to do as part of this course creation is
Take a copy of SCORM drivers and unzip them
Modify manifest.xml,
Add/Update the files inside the ScormContent folder. This is the location where we can have course related content like PDF or videos.
Modify the IndexAPI.html file present inside the scormdriver folder. This is the file triggered when the course is launched. So have some HTML code which can load your course in PDF or video formats.
Once the necessary files are updated, zip this folder and name it uniquely with some course id.
Note: Here is the detailed documentation on how to perform the above steps. SCORM driver quickstart guide
Once the zip file is created for a course by following the above steps, upload the zip file to SCORM cloud. This can be done directly from SCORM cloud account to verify if the zip file is in the correct format or you can upload through code as shown below.
 ScormCloud.Configuration = new RusticiSoftware.HostedEngine.Client.Configuration(“http://cloud.scorm.com/EngineWebServices”,
 YourScormCloudAppId, YourScormCloudSecretKey, “Test Upload Source”);
  var uToken = ScormCloud.UploadService.GetUploadToken();
 UploadResult UpResult = ScormCloud.UploadService.UploadFile(“ZipFIlePath/Course-1.zip”), "default", uToken);
 var results = ScormCloud.CourseService.ImportUploadedCourse(“Course-1”, UpResult.location);
We can verify if the course is successful uploaded or not by checking the Library tab inside your SCORM cloud account.
###Launching a course from SCORM Cloud:
Once the course is successfully uploaded, we can launch the course from our application using the course id and the SCORM .NET library as shown below.
ScormCloud.Configuration = new RusticiSoftware.HostedEngine.Client.Configuration(“http://cloud.scorm.com/EngineWebServices”, YourScormCloudAppId, YourScormCloudSecretKey, “Test Upload Source”);
var status = ScormCloud.DebugService.CloudPing();
string courseURL = ScormCloud.CourseService.GetPreviewUrl(courseId.ToString(), “Return URL or your Home page URL”);
Redirect(courseUrl);
Hope it helps you! Please comment your thoughts.
Pranay
A Software Engineer by profession, a part time blogger and an enthusiast programmer. You can find more about me here.