Serialization and deserialization in Sitecore

This post explains what serialization and deserialization are, how to serialize and deserialize items in Sitecore and how to move Sitecore changes from one instance to another using this concept without creating a package.
If you are looking for differences between Serialization and packaging or advantages of serialization over packaging then go through this post - Serialization vs Packaging in Sitecore
Serialization:
Serialization is the process of converting an object to byte stream in order to save them to memory or database or to file system. Here is the complete explanation of what Serialization is and how it works, from msdn site.
Serializing Sitecore items/tree:
Select the item which you want to serialize. Lets select 'Content' item here

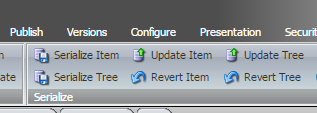
Then click on 'Serialize' or 'serialize tree' option present under the developer tab at the top.
Note: The 'Serialize' option will serializes only the selected item but the 'Serialize tree' option will serialize the selected item and its sub items.
After you click on this option, there won't be any message to confirm that serialization is done. So do not panic. :)
Go to the Sitecore instance's folder and check the path ' \Data\serialization\master\sitecore' . Here you could see the serialized files of the 'Content' item. i.e., 'Content.Item' file and 'Content' folder. YOu can confirm the same by checking the last updated date of these two.

Deserialization:
Deserialization is the reverse process of serialization. i.e., converting the byte stream to an object.
Deserializing Sitecore items/tree:
Go to the path 'SitecoreFolder\Data\serialization\master\sitecore'
Copy the 'Content' folder, 'Content.Item' file and paste in destination folder. The destination folder is nothing but the target machine to which you would like to move the changes. Main the same folder structure in destination Sitecore instance. i.e., Copy those two under 'DestinationSitecoreFolder\Data\serialization\master\sitecore' folder.
Now to go the Sitecore content editor, select 'Content' item and click on 'Revert tree' option under Developer tab. A dialogue box will open showing the progress of the revert option. Sitecore will read the serialized files on the desk (the files what we copied just now) and revert the select item and its sub elements as per the files. Thus the changes are moved from source to destination Sitecore instance.
Serialization and Deserialization using Sitecore admin page:
Sometimes we might need to serialize entire database or multiple database i.e., core and master databases. In that situataion you need not to switch databases, instead we can use the Sitecore provided admin page for serialization
Admin page Path: http://domainName/sitecore/admin/serialization.aspx
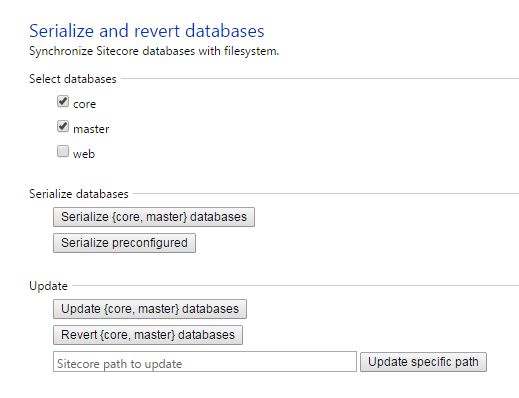
When you open this page, you can see options to select the database and then to choose whether to serialize or revert databases. So select serialize in the source machine and then copy the entire folder and in the destination path. Then select database in the destination sitecore instance and click on revert option to deserialize.
Source: https://sdn.sitecore.net/upload/sitecore6/64/serialization_guide_sc60-64-a4.pdf
Hope you like this article. Please share our thoughts in the comments below. :)
Pranay
A Software Engineer by profession, a part time blogger and an enthusiast programmer. You can find more about me here.


