How to create new page in Sitecore

This post is helpful for beginners in Sitecore development. This tutorial helps creating pages in Sitecore from the scratch involving custom layouts, templates, renderings, content items with presentation details.
I. Visual studio project setup
To setup a Visual Studio project for Sitecore go through the link – Integrating Visual Studio solution with Sitecore MVC
Adding Glassmapper ORM: Glassmapper is an ORM to access the Sitecore items as class objects/models. Install Glassmapper to the Visual studio project by adding the Glass.Mapper.Sc from nuget package manager.
II. Layout creation
Create a layout file in visual studio. i.e., create a .cshtml file inside the Views/Shared folder with name _Layout.cshtml and with the below content.
@using Sitecore.Mvc
<!DOCTYPE html>
<html>
<head>
    <title>Demo 1</title>
    <link href="~/Content/Styles.css" rel="stylesheet" />
</head>
<body>
    <div class="root">
        <div class="header-content">
            @Html.Sitecore().Placeholder("phHeader")
        </div>

        <div class="body-content">
            @Html.Sitecore().Placeholder("phContent")
        </div>

        <div class="footer-content">
            @Html.Sitecore().Placeholder("phFooter")
        </div>
    </div>
</body>
</html>
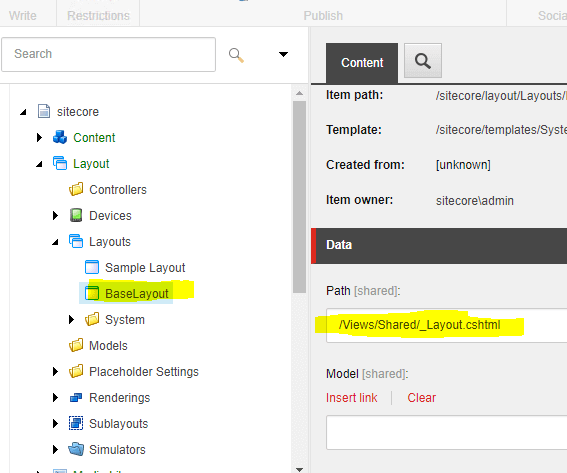
Create a layout item in Sitecore
Go to Content editor in Sitecore
Right click on Layouts (/sitecore/layout/Layouts) item, click ‘insert’ and select ‘Layout’ to create a new Layout. Name it as BaseLayout
Provide the Path value for the new layout. Path: /Views/Shared/_Layout.cshtml

III. Template creation
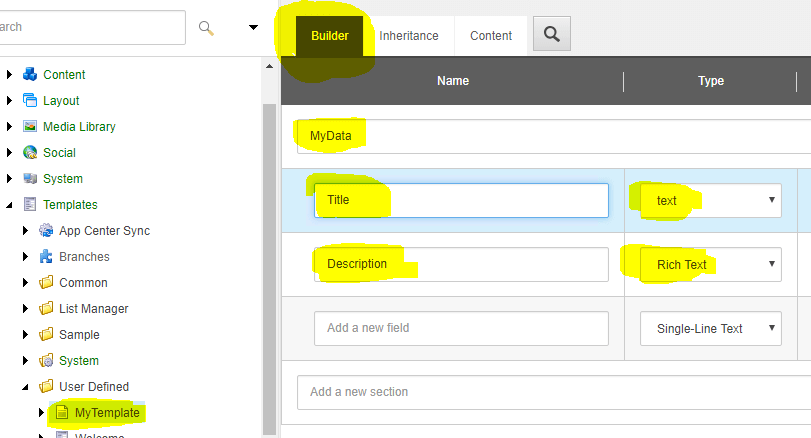
Create a new template in Sitecore
- Right click on Templates (/sitecore/templates/) item, click on insert and select ‘New template’
- Give some name as ‘MyTemplate’
- Give the Base Template as ‘Templates/System/Templates/Standard template’, which is the default value.
- Select the Location as ‘User Defined’.
- Add a section name and create two new fields as shown below.
IV. Renderings creation
Create Controller renderings in Sitecore
Right click on the Renderings item, click insert and select Controller rendering. Name it as Home Content
Give the Controller and Controller Action field values as below
Controller: Home
Controller Action: Index
Similarly create another four Controller renderings in Sitecore by following the above steps but with different names and values as below.

Rendering Name: About Content, Controller: Home, Controller Action: About
Rendering Name: Contact Content, Controller: Home, Controller Action: Contact
Rendering Name: Header, Controller: Home, Controller Action: Header
Rendering Name: Footer, Controller: Home, Controller Action: Footer
V. Pages creation
Lets create some simple pages in visual studio – Home page, About page, Contact page
Go to the Visual studio and create a Controller ‘Home’ with below action methods.
- Index
- Header
- Footer
- About
- Contact
Below is the code snippet for the same.
 using System;
 using System.Collections.Generic;
 using System.Linq;
 using System.Web;
 using System.Web.Mvc;
 using Glass.Mapper.Sc;

 namespace SitecoreApp.Controllers
 {
     public class HomeController : Controller
     {
         public ActionResult Index()
         {
             var context = new SitecoreContext();
             var viewModel = context.GetCurrentItem<MyTemplate>();
             return View(viewModel);
         }
         public ActionResult Header()
         {
             return View();
         }
         public ActionResult Footer()
         {
             return View();
         }
         public ActionResult About()
         {
             var context = new SitecoreContext();
             var viewModel = context.GetCurrentItem<MyTemplate>();
             return View(viewModel);
         }
         public ActionResult Contact()
         {
             var context = new SitecoreContext();
             var viewModel = context.GetCurrentItem<MyTemplate>();
             return View(viewModel);
         }
     }
 }
Model - MyTemplate.cs
 using Glass.Mapper.Sc.Configuration.Attributes;
 using System;

 namespace SitecoreApp.Models
 {
     public class MyTemplate
     {
         [SitecoreId]
         public virtual Guid Id { get; set; }

         [SitecoreField]
         public virtual string Title { get; set; }

         [SitecoreField]
         public virtual string Description { get; set; }
     }
 }
For the above created action methods, create respective views with simple content as shown below.
Index.cshtml
 @inherits Glass.Mapper.Sc.Web.Mvc.GlassView<SitecoreApp.Models.MyTemplate>
 <h2>@Model.Title</h2>
 <div>@Html.Raw(Model.Description)</div>
Header.cshtml
<h2>Header</h2>Footer.cshtml
<h2>Footer</h2>Contact.cshtml
 @inherits Glass.Mapper.Sc.Web.Mvc.GlassView<SitecoreApp.Models.MyTemplate>
 <h2>@Model.Title</h2>
 <div>@Html.Raw(Model.Description)</div>
About.cshtml
 @inherits Glass.Mapper.Sc.Web.Mvc.GlassView<SitecoreApp.Models.MyTemplate>
 <h2>@Model.Title</h2>
 <div>@Html.Raw(Model.Description)</div>
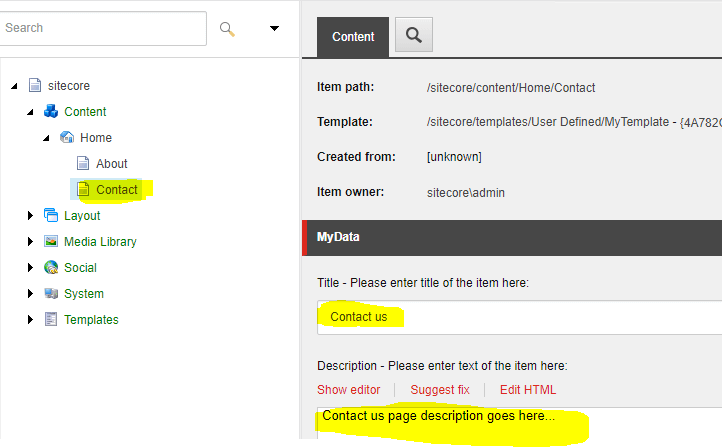
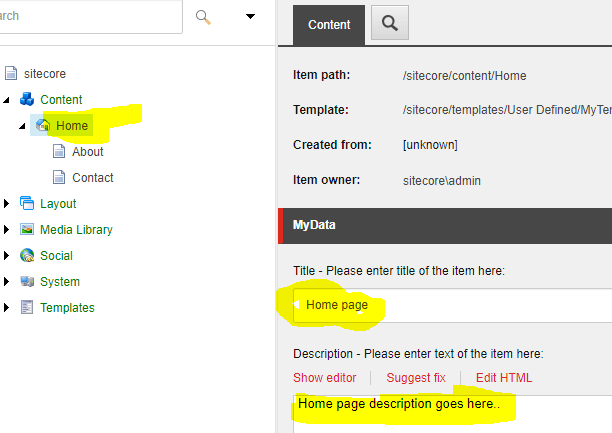
Create Content items in Sitecore for each of these pages
Right click on the Home item, click insert and select ‘Insert from Template’.
Select the Template as /User Defined/MyTemplate.
Name the item as ‘About.
Give some ‘Title’ and ‘Description’ for the page
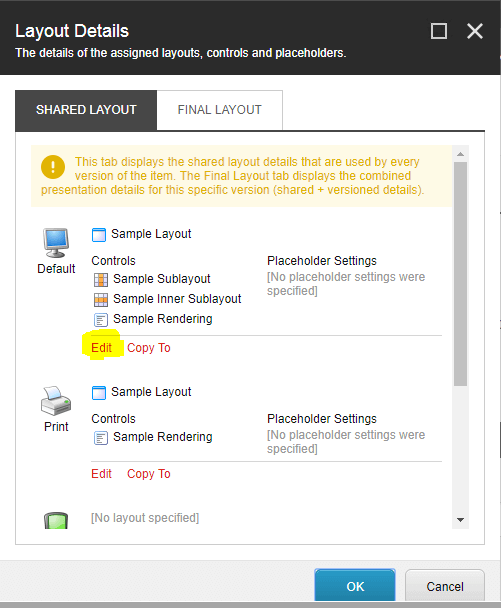
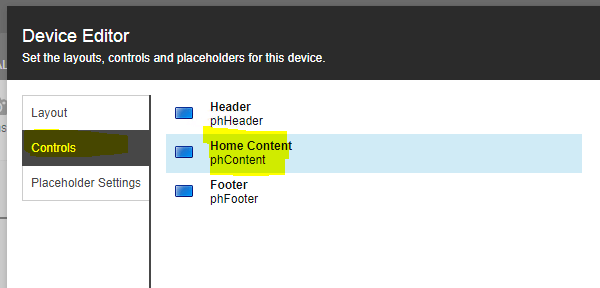
Select the About item. Go to the Presentation tab at the top and click on ‘Details’. Edit the Default layout.
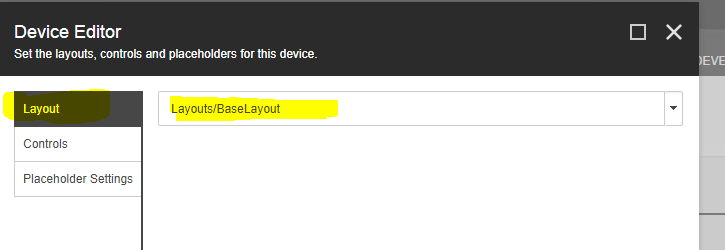
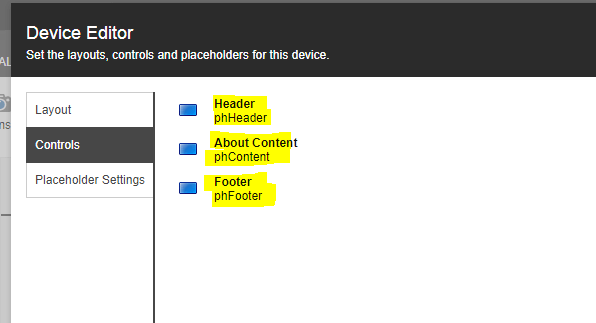
Add the layout as shown below.
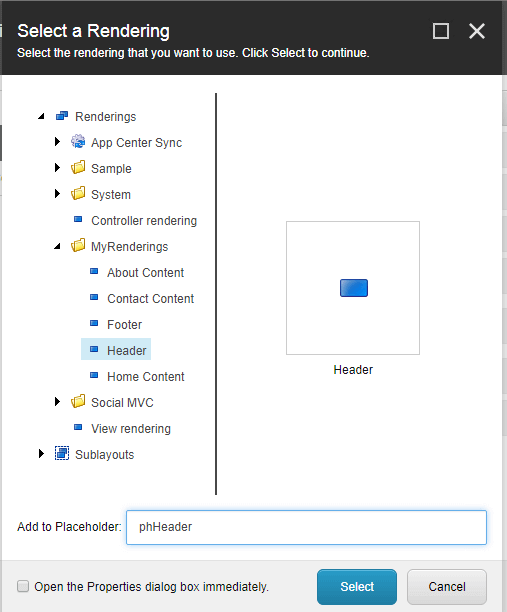
Add the below renderings with respective placeholders
- Header
- About
- Footer
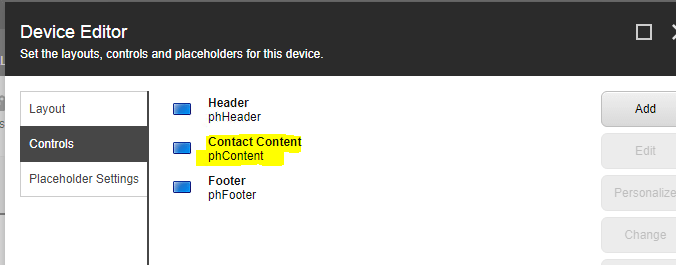
With this, we have completed the creation of About page. Similarly create another item Contact and assign the renderings respectively as shown below.
Similarly, edit the Home item’s presentation details as below.
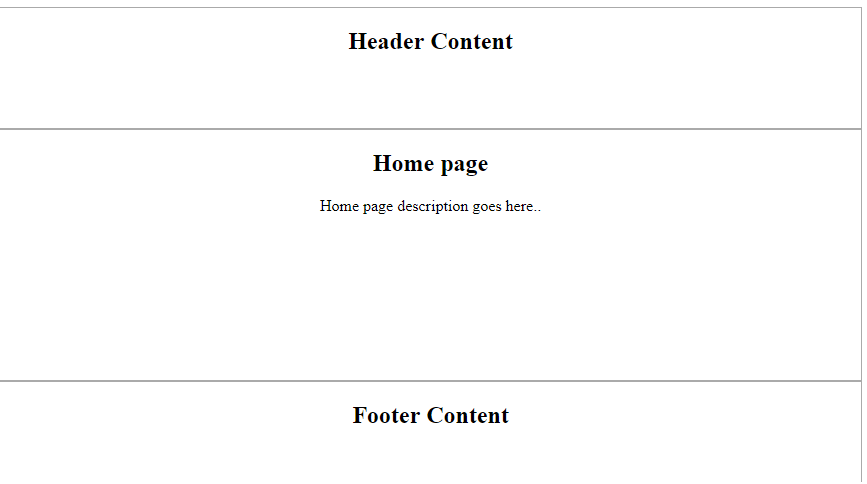
VI. Publishing and testing
Republish the website and the browse the pages using the below URLs
Home page – http://instancename/Home
About page – http://instancename/About
Contact page – http://instancename/Contact


Pranay
A Software Engineer by profession, a part time blogger and an enthusiast programmer. You can find more about me here.


